Monday, October 29, 2012

Peaches and Cream Soap!

More delicious soap!! Love this one. Check it out!


The tangerine orange clear base is peach scented while the white Shea butter base is scented with warm vanilla sugar.
This soap has wonderful lather and extreme moisturizing contents since half of it is made with Shea butter base.
Check out my etsy.com store soapisticated.etsy.com for more information on this soap as well as a couple others!

Wednesday, October 17, 2012

The Wonderful World of Soap

Well, I've been MIA for quite some time now! Why? Well, I am officially a homeowner. It's been crazy between vacations, work, and buying a new house that I haven't even thought about blogging. Shame on me.

Now that I have halfway settled into my new home, I decided to take on soapmaking. I got the inspiration from my aunt, who started making her own cold process so from scratch. I decided that I was going to start out with a more simple tactic, and went with Melt and Pour soapmaking. There are actually many options and fun ideas when creating melt and pour soap.

After watching thousands of YouTube videos and reading bunches of soap making blogs, I decided to just DO IT! So I did. I went to a craft store, and bought the soap basis, fragrances, and colorants. I decided to go with craft store supplies first before I paid extra money on the good stuff.

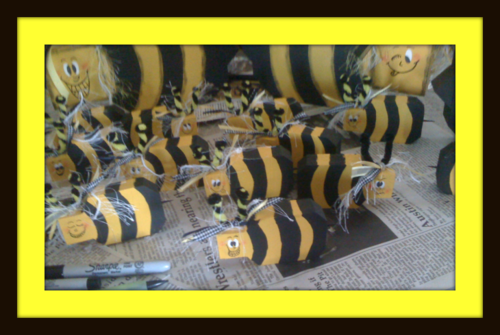
My first batch of soap was made with the craft store supplies. It turned out very well considering I have never done it before. Here's a picture of my first loaf of soap.


Tuesday, July 3, 2012

Fourth of July Pops

Happy Independence Day everyone!!!
I hope everyone else can enjoy fireworks for us here in Colorado, as we have bans due to such hot and dry weather. Spending time with family and eating are more important than fireworks anyways. :)
Hope you enjoy my festive cake pop pics!


I used a small star cookie cutter to mold the pops!


I then had way too much fun decorating them in fun colors, sprinkles, and sparkles!


Crappy iPhone pic, I apologize.
Red=Strawberry, White=Vanilla Cream Cheese, Blue=German Chocolate
They were so cute that I didn't want to eat them! But they definitely went faaassssttt!

Thursday, June 7, 2012

Cupcake Cake Ball Bites

So, I caved and bought Bakerella's book Cake Pops for some fun ideas. I found the cupcake cake pops and reaaallllyyy wanted to try them. They looked so stinkin adorable. I already had some frozen {cake} balls leftover from my niece's birthday party. So I thought, what the heck, they need to be eaten. Here is how they ended up looking.


Monkey Birthday Party


Oh how the time has flown by. My niece turned two this May. It seems like yesterday when we were planning her bumblebee first birthday party! Sheesh!!
This year we did a pink, green, and yellow monkey theme. It definitely took less time {and money} than the bumblebee theme. It turned out pretty darn cute if I might say so myself! Here are a few pics/ideas from the party!


{Mommy and Hailey, Auntie Lillie and Hailey}


Sunday, May 6, 2012

Spring Has Arrived!

Well, with the weather we've been having for the past month or more, it's been spring since the end of March or beginning of April. This last weekend was dedicated to working in the yard and planting flowers. I just love it when everything starts turning green and the flowers start blooming.
Here are a few pictures of the yard and also some projects that I worked on this weekend.


I love the orange poppies!!! I wish they would bloom a lot longer. From far away they look like orange tissue paper flowers.


Lots and lots of planting flowers. I'm excited to see what all the pots look like once the flowers are lush and full and blooming.


Pots and flowers, pots and flowers, pots and flowers. :) :)
Happy Springtime everyone!


Coffee Corner Wall Art

MMMMM!!! COFFEE, COFFEE, COFFEE, COFFEE, COFFEE!! {Kinda like the commercial with the dog that's yelling BACON, BACON BACON!!! That's how I'd say it.} I don't know how anyone couldn't like the smell of coffee.  Especially in the morning!! So delish.  {starting to drool}


Here is just another quick and easy wall update for Mom's shop! She has a cute little corner area where she puts all of her coffee, tea, and fixins' which needed some decor. Momma loves her coffee!!


Again, I just used my cricut to cut out all of the letters and also the coffee cup decor. I then hung them up with some more sticky tack just like I did with my other wall decal post.


Mom's shop walls are pretty bare so just this little bit definitely goes a long way. Cheers the place up a bit! Nobody wants to work in a dull setting.


Just writing this made me have a coffee craving Gotta go have a cup NOW!!  Mouth is watering.

Sunday, April 29, 2012

Hanging Herb Garden

I was really wanting my own herb garden so I decided to finally just do it. After looking at a bunch of do-it-yourself herb gardens, I finally found an idea I loved and just ran with it.  Check out the blog paper{whites} for my inspiration!  Lots of cute stuff there.

I wanted something that was easy to move indoors for the winter months, so I decided to do hanging herb pots. This weekend I decided to just do it {nike style}. And so I did. I bought the pots {which I poked holes in the side for the rope}, the herbs, I cut small pieces of scrap wood, drilled holes and spray-painted them, and put them all together. I already had the rope/twine for it which worked great.
I'm pretty excited about it!
Here they are!


- Posted using BlogPress from my iPad

Thursday, April 26, 2012

Wall decals? Nope!!

My Mom has a commercial print shop which needed a little something. She had a great big, bare, white wall that was screaming for color. Since Mom's favorite color is purple, I decided that needed to be the focal spot of color. This was MUCH easier than dealing with wall decals...trying to put them on level and pealing without ripping, etc.


I'm pretty impressed with how this came out, especially when it was a last-second idea, two hours before I went on call. And because my mom owns a printing shop, I had everything I needed to complete it. So all it costed me was a couple hours of time {can't beat that!!!}.
The one foot "love" letters were made out of cardboard and wrapped in purple scrapbooking paper. I just sketched them myself and cut them out with scissors. Mom had some thinner, black cardboard that I used for the smaller letters which are four inches. I used my cricut to cut out those letters. You wouldn't have to use cardboard, index or thick scrapbooking paper would have worked fine. I was just being selfish and didn't want to use a lot of my scrapbook supplies
Then I found some handy dandy fun tact/sticky tack/the whatever you want to call stretchy smushy stuff, and hung the letters up with that. I just eyeballed the levelness of each letter and prayed they wouldn't be going uphill. Fortunately, I didn't even have to change anything around {I never get that lucky}!!
How's that for a two hour DIY bare wall enhancement? I say, not too shabby.
Lillie


Saturday, April 7, 2012

Easter Goodies


Easter cookies, cake pops {German Chocolate Coconut Pecan and Carrot Cake Cream Cheese}, and deviled eggs!

Wednesday, April 4, 2012

Easter Card


Here is a homemade Easter card I sent to my bf's mom. It was a quick put together. Thought it looked pretty cute considering the little time I actually spent on it.


I had to add a cute little stamp on the back of the envelope! It looked so plain compared to the card. Hehe 


Just passing on another idea! Hope you like it!


Tuesday, April 3, 2012

Kitchen Wall Art


What do you know...another spray paint decor project! You just can't get me away from that stuff! :)

We finally got around to hanging my sister's wall art in her kitchen {we had painted it almost a whole month ago} and I must say...not too shabby! It worked out perfect with the small, bare wall that was above a can cupboard.

The frames were all bought at a thrift store, equaling around $2.00. I just spray painted them and added pictures and hung one empty {talk about easy wall art}.

I decoupaged scrapbook paper onto a decorative wood piece I got at Hobby Lobby. That place {which I call Heaven once I step in} has a bunch of different wooden pieces in different shapes and designs.

The canvas wall art was made with stick on letters and spray paint.
I spray painted a wooden spoon ($.50 at the thrift store) white and hot glued it to the canvas and voilà!! Same thing I did for my Simple Kitchen Art!
Way too easy.

Perfect colors for Easter and Spring time!

Check out MY dining room cheap wall art...yet another picture frame spray paint fiasco!  After buying a house in August of 2012, I can now do my OWN cheap wall art!

Wednesday, March 28, 2012

TP Roll Wall Art

Yup, you read right, that TP=Toilet Paper!

My Mom's printing shop needed a bit of decor. So I decided to try out the infamous toilet paper roll art. It turned out pretty darn cool if you ask me! I spray painted them purple since mom has a purple stripe along the top of the walls. These are hanging just above her computer desk. Before, it looked so bare. Now, it adds a little more homey feel. 

Canvas Wall Decor

Here is another simple, fairly cheap, and easy wall decor project you can make in hundreds of different variations. All you need is a canvas, or a few, paint to change the color of the canvas, and different types of ribbon.


Click on the picture for a better view of the different types of ribbon I used.


In this case I just did simple black and white. I left one canvas white and painted the other black. I then took strips of ribbon and used double sided permanent tape to keep the ribbon on the canvas. I wrapped the ribbon around the back and taped to secure.

Hope you enjoy the easy idea!

:) Lillie


Sunday, March 25, 2012

Jordan Almond Easter Decor


Ahhhh, the ideas that pinterest gives me! Yes, I stole this concept from pinterest, however instead of making a wreath, I made Easter Trees!

Wednesday, March 14, 2012

Simple Kitchen Art

So easy, simple, and CHEAP {I'm all about saving money}!!  I already had the canvas and spray paint for them, all I needed were some short kitchen accessories.  Found the two small wooden spoons at a second hand store for the huge price of $0.50!!  Yup, a whole whopping 25 cents each.  I spray painted them with an ivory color.  I also spray painted the two canvases {...canvi? canvases doesn't sound right} to go with our tangerine and green kitchen {walls are tangerine, so we needed more green accents}.  After each dried, I hot glued the wooden spoons on and just leaned both against the wall behind our stove.

Little did I know that the spray paint color I already had matched almost perfectly with the Tea Pot!
We love it!


Mantle Decor

I decided to do something a little different to our mantle.  I re-spray-painted the two pillar candle holders, found an empty frame and a "B" from the thrift store {cheap, cheap cheap!!!} and spray painted them, added  DIY canvas art, rearranged some things that were already up there, and POW here it is!

Multi-Season Wreath

I finally buckled down and did it.  Well, I just needed a hardcore, solid trip to a hobby store or it would have been done a lot sooner.  I've been wanting to make a wreath like you see everywhere on Pinterest.  I'm so happy with how it came out!  It didn't take me longer than an hour to do too, which was a plus.  The colors I chose can work for Spring, Summer, or even Fall!  I placed the flowers in with pins instead of gluing them permanently.  That way I can change out flowers if I want to!  Yay me {sometimes I surprise myself with my smartness}!! :)  Anyways...here it is!


I'm definitely planning to make more!  They're too fun.


Tuesday, February 28, 2012

Spray Painted Clothes Pins

Yay for making laundry more fun!!!!! {HA}

Saw this idea HERE via Pinterest.  I absolutely LOVED the vintage color scheme that she had!  I decided to not copy {for once} and came up with my own melon-y color scheme.  


I just spray painted each side of the clothes pins and let dry!  They really do brighten up the laundry room a bit.  I'm hoping it does the same to the actual "doing" of the laundry. :)

Crackle Paint Frames

I've had the crackle paint and two wooden pictures frames for quite a while.  I decided I should just put two and two together and see how it would work!

Monday, February 27, 2012

Bumble Bee 1st Birthday


I just realized I hadn't posted this on here yet!  Heck, we're already starting to get things together for my niece's 2nd Birthday in May.  Anyways, here is what we did for her 1st Birthday! :)

I made these adorable bumble bees out of scrap wood and a little bit of paint for my niece Hailey’s first birthday in May!  We used the large ones as table center pieces and the smaller ones for each person’s place setting.

Sunday, February 19, 2012

Bottle Cap Magnets

As I was sitting at work, looking busy of course, browsing a handful of DIY craft blogs {this was before they weren't monitoring internet usage...sadly we cannot browse anymore}, I came across a fun idea.  (Sorry, don’t remember the source, however you can search how to do this on youtube)  BOTTLE CAP MAGNETS!! They’re super cute and fun.  There are so many designs, themes, colors, etc you can dress them up with.  My mom does digital scrapbooking, so I used a bunch of images from her digital scrapbooking supplies to print out and use on my bottle caps.  You can also use decorative scrapbook paper.  Just punch them out with a 1” hole punch!  Here are just a few I’ve made… 


I'm in love with my coffee magnets.  They are my fav so far!

Zebra Wall Art


I loved doing this zebra project.  I bought 3-12x12 canvas from Hobby Lobby.  I blew up a photo of a zebra and drew the zebra stripes onto the canvas.  I used black acrylic paint and just painted on the stripes!  Pretty darn easy! 

Thursday, February 16, 2012

CAKE POPS!!! MMMM

So, I've been really loving all of these cute Cake Pops/Balls I've seen online.  I decided it was time for me to try them out myself! :)

I used German Chocolate Cake and Coconut Pecan frosting.  I coated them in chocolate and used coconut for a topper, as well as almond bark drizzled on top of some.

There are tons of different ways to make these, just search google or youtube for them!

 My First Attempt at Cake Pops!

Can't wait to dig my teeth into these babies!!! MMMM!

Sunday, January 29, 2012

Crayon Letter Art


I made this cute “H” out of crayons for my 17 month old niece Hailey (who is the cutest little girl in the world) in under an hour!  Soooo easy.
The tutorial for this project is from The Trendy Treehouse.  Just click HERE!!.

CD Case Wall Art


This site inspired me to do this project.  They have a very helpful video!
For some simple instructions…READ MORE!! :) :)

Thursday, January 19, 2012

To DIE For Turtle Cake


Just made this fabulous cake today for my sister's birthday.  It's called Turtle Cake.  I'm a sucker for anything turtle, so I just looked up Turtle Cake online and saw a beautiful picture of this cake (mine looks a little different, I chopped up the pecans a bit).  It's actually a very simple cake!  It didn't take long at all.  I totally cannot wait to dig into this.  My mouth is watering just looking at it!!!  Hope my sister doesn't mind if a little bite is taken out of it before her birthday dinner. :)

Happy Birthday Casey!!

Click here for the recipe! Enjoy!!

Monday, January 2, 2012

Bring on 2012!!!

Good Lord has the last year flown.  How is it already 2012????  It blows my mind.  I'm entering this new year on a new note.  It is going to be a great year.  I can feel it!

My New Years Resolution?  HA!  Of course its the real original "eat healthier, work out, and lose weight".  But also I want to finish things I've started.  Whether it be that dang crocheted afghan I've been working on for three years, or a book series, or quitting a bad habit, or a certain chapter in my life that I'm done with.  I'm ready to start fresh.  I want to look back on December 31, 2012 (if the world still exists ha ha ha!) and truly say it was an awesome year filled with amazing memories and no regrets.  I have a good feeling about this year.

So...here I go!  I'm hoping to work more on my blog and share more of my projects and life with you!  But before that, I must go to work.

Happy 2012 everyone!!