I just realized I hadn't posted this on here yet! Heck, we're already starting to get things together for my niece's 2nd Birthday in May. Anyways, here is what we did for her 1st Birthday! :)
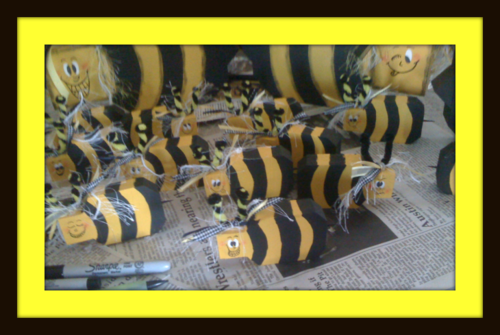
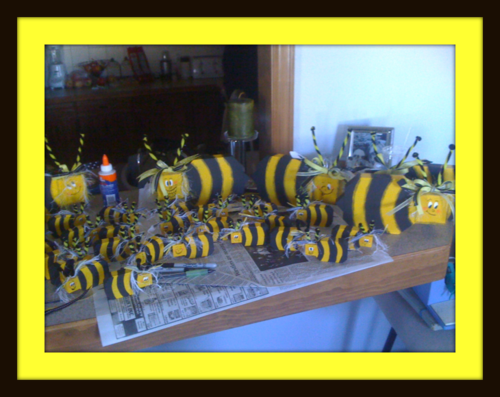
I made these adorable bumble bees out of scrap wood and a little bit of paint for my niece Hailey’s first birthday in May! We used the large ones as table center pieces and the smaller ones for each person’s place setting.
The inspiration for these are here, as well as ideas for the bumble bee themed party we did. Read more below for some instructions and more pictures of the party for ideas!
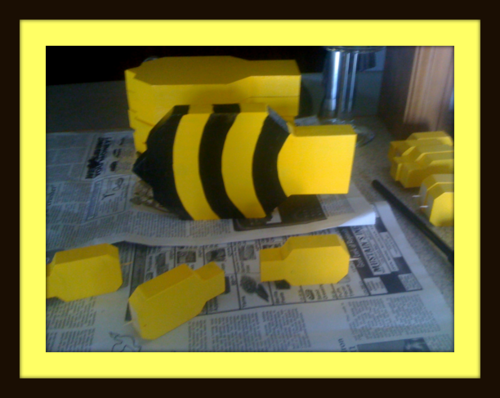
My grandpa used to be into wood work, so he had every type of saw, sander, and tool I needed to make these! He had a ton of scrap wood and boards that I used. I drew out a template on grid paper. A square head, a square body, and and angled corners. Two different sizes, some large for center pieces, and some pretty small/palm sized for people’s place settings.
I then traced the template onto the boards. I used a thicker piece of wood for the bigger ones so they would stand up without tipping over very easy. I think they were 1.5 to 2 inches thick. For the smaller ones, I used a 4x1” board.
I used a band saw and simply followed the lines of my drawn on shape to cut out them out. I think we ended up with 6 large bees and around 25 small bees.
When I angled the corners of the larger bees, I used the cut off corners as the stingers and just glued it on with wood glue!
For the stingers of the smaller bees, I used a tiny bit and drilled a teeny hole at the end of the bee about toothpick size, and trimmed down a toothpick and inserted it.
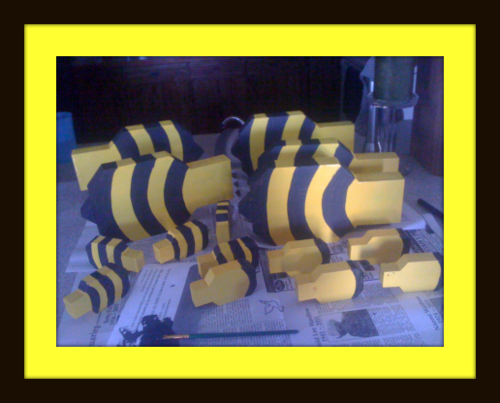
I then painted all the wood cut outs yellow except for the bottom where they sit and the end where the stinger is, because that would be painted black. After they dried, I used black acrylic paint and free painted stripes.
On the larger bees, I used a paintbrush that didn’t have much paint in it and kind of “scribbled” on an outline of the face.
While I was waiting for the paint to dry, I used my cricut to cut out ovals on white paper for the eyes. I used a black sharpie to draw the pupils of the eyes, some crossed, some looking up or different directions, etc.
Once they were all dry, I glued on the eyes and drew on silly and fun faces. I used a bright orange/pink lipstick I had and dabbed it on with my finger for pink cheeks.
I had a bunch of left over white and black fuzzy yarn, and some black and white ribbon to use for the bows on top of the head. I bought some polka-dot ribbon and some yellow ribbon as well. I twisted black and yellow pipe cleaners together and twisted the ends into balls for the antennas.
My mom and grandma are master bow makers, so they helped me make bows. They tied the bows, and before tightening them, they thread through the antennas so the bow would be connected to the antennas. We then trimmed the ribbon and yarn, and hot glued them on top of the head!
These were so fun and so cute! They were a bit time consuming, but all in all worth every minute, especially since I had most of the supplies already. We are planning on reusing them as well for future birthday parties (since Hailey probably won’t remember this one).
Here are some fun pics from the party!!!
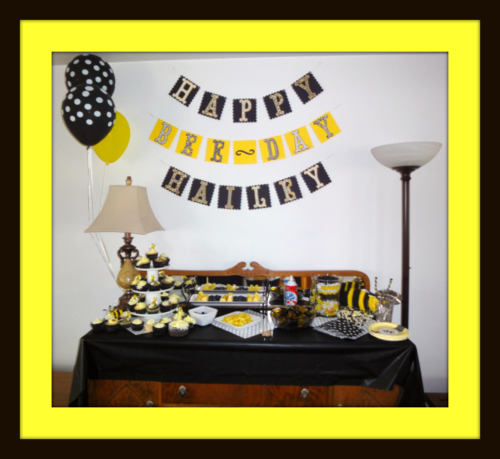
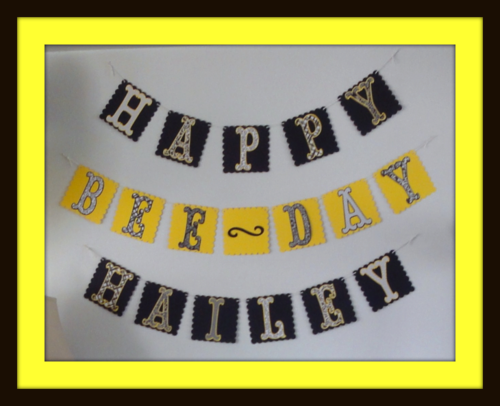
Used my cricut to create the Happy Bee-day Hailey banner.
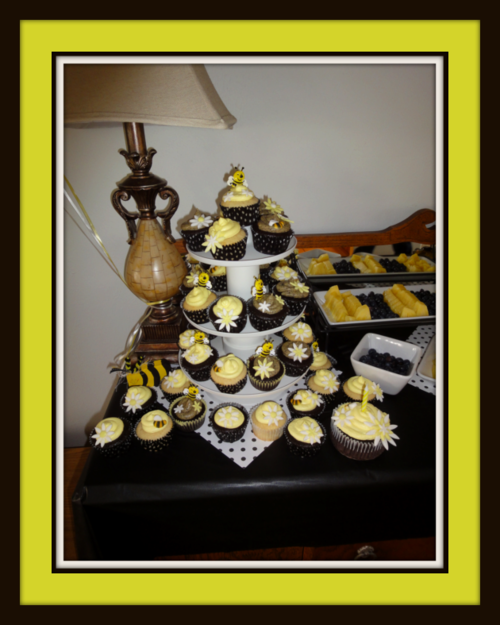

We made chocolate and vanilla cupcakes with homemade cream cheese frosting with yellow food coloring. We also made our own fondant daisies.
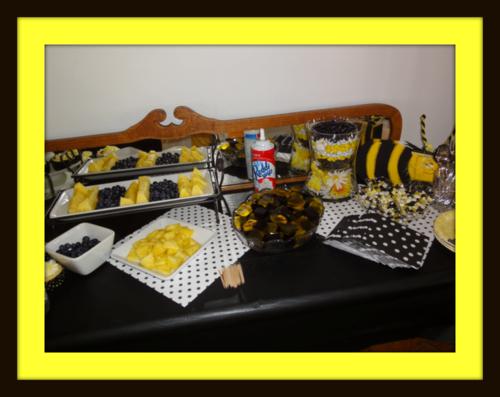
Blueberries and pineapple, lemon and grape jello jigglers, Jelly Bellies, and colored m&ms!
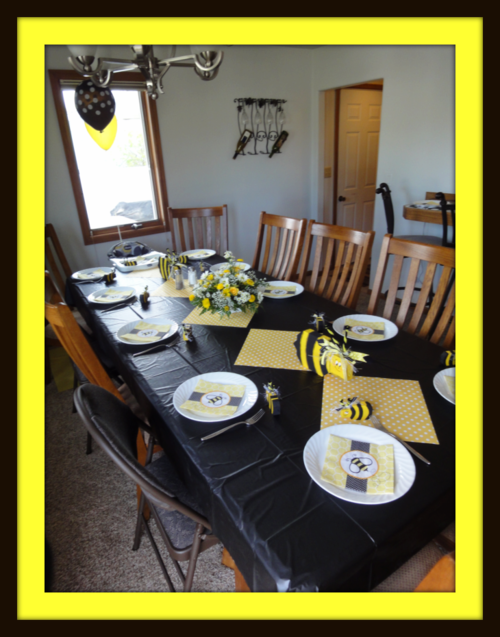
Fun scrapbook paper to line the center of the tables!
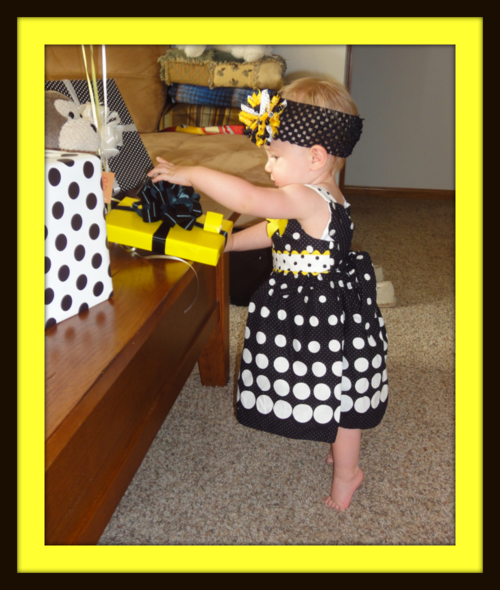
Little birthday girl on her tippie-toes checking out her gifts!!
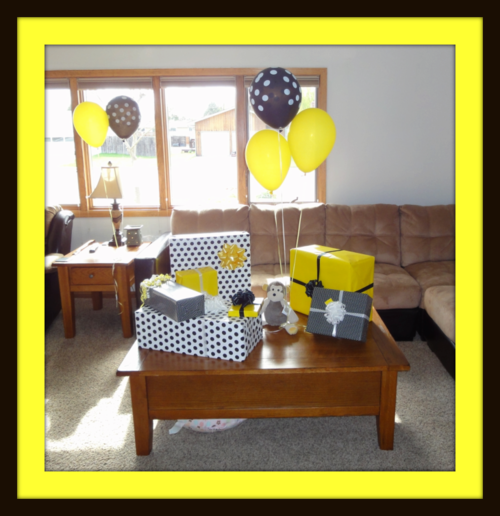
The black with the small white polka dot wrapping paper, my sister already had. I bought the yellow and white with large black polka dot wrapping paper at hobby lobby. Party City, or any party store has the balloons!
We had too much fun!! Now to planning the 2nd birthday...Monkeys!!!
No comments:
Post a Comment