Wednesday, December 4, 2013

Wednesday, October 23, 2013

Almond Biscotti Soap

Here is another fall soap on my Etsy!  Check out my Almond Biscotti Soap.  Such a warm, sweet, and yummy scent.  Perfect for the fall season.

Check out my site, Soapisticated.etsy.com to see more soaps and handmade items!

Almond Biscotti Soap - Fall Soap - Glycerin Soap - Sweet Almond Soap - Seasonal Soap


Pumpkin Spice Soap


Now available on Etsy!  Check out my Pumpkin Spice Soap.  It has an amazing, rich, and creamy fragrance which can smell up a room after each use!  A perfect fall soap.

Check out my etsy site, Soapisticated.etsy.com for more fun soaps and other handmade items!

Pumpkin Spice Soap - Fall Soap - Glycerin Soap

DIY Fall Bottles

Need an easy DIY Fall Home Decor idea?  Have someone willing to save their beer bottles for you?  Well, this one is for you.  Thanks to my (seems like) endless supply of hemp/twine/jute...whatever you want to call it... and my man's love for Red Stripe Beer (you know, the ones that look like medicine bottles?) I've been able to do a couple projects like this!  This is for my sister's house.

Lets get started!

Monday, September 9, 2013

Hand Crocheted Baby Blanket


WOOHOO! 

I've added a hand crocheted baby blanket to etsy HERE

I've only had my handmade soap on my etsy site but I decided to throw in my other loved hobby in the mix. The first piece of crocheted loveliness on my etsy site is a beautiful color blocked ombre pink baby blanket/afghan. It is vibrant, yet so so soft. 

This color block idea came from a super cute blog I came across on etsy, The Sweeter Side of Mommyhood (her new blog).  Check out HER blankets she made, as well as the tutorials she posted on how to create them HERE (her old blog).  I'm so thankful she shared because I absolutely LOVE how my ombre version of her color block blankets turned out!  Thanks, Jacquie!!

 Be sure to check it out.  AND make sure to come back, as I will be adding more fun crocheted pieces.  Tis the season to crochet! 


Wednesday, August 28, 2013

Wall of Frames!

Because, who doesn't like a good ol' wall o' frames? :)
 
I've had my house for ONE YEAR now (I can't believe it! Time flies!) and I haven't even made one single DIY cheapo home decor post!  I've been neglecting my blog, I know, but I've been having too much fun doing other cool stuff...meh...Ok, I have no good excuse.  Time to put the big girl undies (I absolutely loathe that "P" word for women's underwear and refuse to type it, let alone say it) on and get back on the wagon. 

BACK TO THE POINT...so I have a good sized wall in my dining room, a perfect palate for fun wall art!  I thought I'd share what I've done with the space, as I have gotten lots of compliments on it!  Little do they all know that majority of the objects on the wall are from, shhhhhhhh, thrift stores and garage sales!  CHEAP!  I'm cheap.  I don't care.  I mean come on, I'm 24 25 and own a house, car, and have a bajillion bills to pay each month...I'm all for cheap.

I always wanted a wall where I could just put up a bunch of empty frames, thanks to all of the pinterest ideas.  So I did just that.  I was on a mission to find some cool lookin, empty picture frames.  Our tiny little town of 3500 or so has three thrift stores.  I hit the frickin jackpot.  They each had tons of frames, lots of different sizes, shapes, and designs.  Decisions decisions.  I went for the more vintage looking detailed ones.  I had found a couple vintage oval cameos at a garage sale, the week I closed on my house, that I couldn't pass up for the wall as well (yes I had already planned to do a wall of frames on that particular wall before I even bought the house).  I think I spent maybe a total of 15 bucks?  It wasn't much!

My kitchen and dining room are painted in vintage colors; coral, yellow, and aqua.  I've decorated with old metal signs and records, a lot of which my family had saved from way back when (more pics to come).  The dining room wall is a vintage yellow, so I planned to paint all of my objects with the other colors of the kitchen.  I already had some teal, beige, and aqua spray paint, along with leftover coral wall paint. 

After the painting was finished, I made a layout on the floor below the wall of how I wanted to place my frames/cameos.  I still had a couple records to use, so I decided to add those in for fun accent pieces.  I absolutely loved how it turned out!  So fun!  Here comes my attempt at good photography (hence all the angles and close ups I took).


Be sure to click on the pics to have a bigger better view!


My darling sister gave me a nice black cabinet that fit perfect in that area and is great storage for crystal and party glasses!  Thanks sis!


Monday, March 18, 2013

Easter and Spring Soaps

I can't believe that Spring and Easter are almost here!!  Good thing I made a couple types of soap for this time of year!  Check them out! 


These and many more handmade soaps are at Soapisticated.etsy.com.

Thursday, February 7, 2013

Tid Bit on Homemade Soap

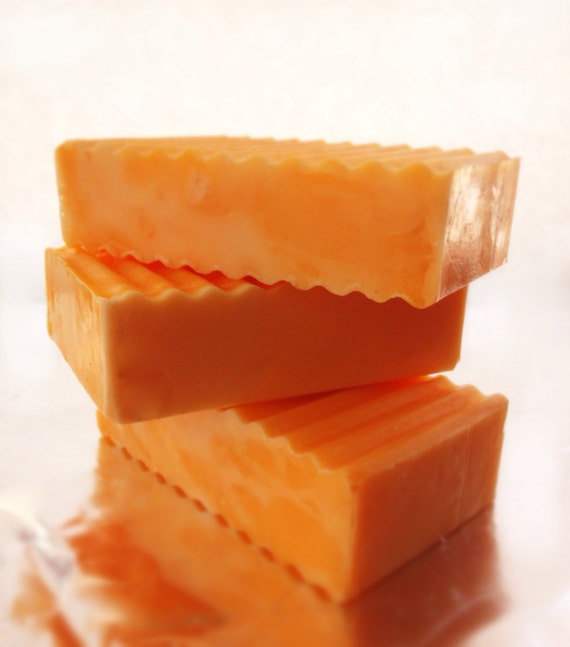
Here is a tid bit of info about the oils and butters I use in my vegan/natural soaps (cold and hot process) and how they are good for your skin!

Soaps bought from the store contain so many harsh chemicals used to produce the lather, creaminess, and hardness of the bar, which in turn can strip your skin from the nutrients and moisture it needs. My soaps from scratch are rid of all of those things, leaving your skin with the correct nutrients, moisture, and conditioner it really needs!

Natural/vegan/soap from scratch is great for those with acne, eczema, dry, or sensitive skin (especially my soaps without fragrance or color, which will be up soon)!

Olive Oil: Rich in vitamins and minerals, this oil is nourishing and calming to the skin. This oil attracts external moisture to the skin, which helps keep the skin soft and supple. The properties of this oil gives the bar hardness, lather, moisture, and is very conditioning. Olive oil is usually the main oil in my soap bars, along with palm and coconut.

Canola Oil: This oil gives the bar lather, softness, and great conditioning properties!

Coconut oil: When used moderately and correctly, this oil is emollient, moisturizing, conditioning and protecting to the skin. It gives the bar hardness and a fluffy lather.

Palm Oil: This oil makes a hard, mild bar of soap that cleans very well. It's properties give the bar hardness, lather, conditioning, and a silky feel.

Castor Oil: This oil is an excellent humectant, attracting and holding moisture to the skin. Very rich in fatty acids adding conditioner, moisturizer, softness, a fluffy lather to the soap!

Shea Butter: Shea butter is said to be very beneficial for treating dry skin, blemishes, skin discoloration, scars, and wrinkles. It is very moisturizing, cleansing, nourishing, and silky.

I also use other ingredients such as ground oats, ground flaxseed, sugar, spices, seeds, and herbs to give soaps more healing, nutritional properties for your skin as well as amazing exfoliates.

Some herbs and spices can be used for natural colorants too along with their nutritional content.

Honey, goats milk, and coconut milk are also sometimes added for that extra boost of moisturizer and conditioner.

Heck, you can even make BEER SOAP! Beer is actually very good for your skin! "Hops, an ingredient found in beer, itself is known for its relaxing properties. Hops contains poly-phenols thought to account for its anti-bacterial and preservative effects (beers long life) and it also contains skin-softening amino acids." I will be making this soon for the guys out there (or for you beer lovin ladies as well!). It doesn't actually smell like beer, or have any alcohol left in the soap, however I do have a yummy Oatmeal Stout Fragrance I need to try out! :)

There are so many combos of ingredients you can use to make soap, all of which are so much better for your skin than store bought! Hope I've answered some questions!

How's THAT for an afternoon read? ;)

Soaping! Hot Process

The art of soap making has taken over my life! Every bit of time off I get, I've been putting towards soap making. It's so much fun!


Recently, I've starting making soap from scratch using the Hot Process method.  I got the inspiration (and tutorial) from Suzanne at her blog, Chickens in the Road. I like the idea of a less curing time that goes with this process compared to the 4-6 week wait for the cold process soap! I also love the "homemade" and "rustic" look that the hot process gives the soap. However, you can definitely do more with cold process soap when it comes to decorating and designing the soaps.


I make my hot process soap with a crock pot. You can also use a double boiler, or even the oven. I just boogied on down to our town's thrift store and bought a large, heavy duty crock pot for CHEAP!


For Hot Process soap instructions, check out this blog, Chickens in the Road!


To check out all of my soaps, go to Soapisticated.etsy.com.


Here are some photos of a couple types of my Hot Process Soap, along with their ingredients, and a bit about the ingredients in the soap and what it can do for your skin.  


Enjoy!


Sage and Lemongrass HP Soap