I wanted to share a few before and after pics of the bathroom (which in the end, sold me on the house) we've improved mostly ourselves. There are still a few things I'd like to completely redo, like cabinets, counter top (there's a lot, thus why I loved it so much), and the backsplash, but it has DEFINITELY come a looooonnnngggg way. I didn't realize this until I put the before and after pics side by side. Holy cow.
I will add a complete post of the bathroom improvement in the future including pictures before, during, and after, my design vision and style ideas, lists of changes, what we did ourselves and what we had professionally done (which wasn't much), and maybe some tips and tricks to help make your improvement go a little quicker.
I'm LOVING my new industrial style bath, thanks to my family!
Showing posts with label Drab to Fab. Show all posts
Showing posts with label Drab to Fab. Show all posts
Thursday, July 10, 2014


Wednesday, October 23, 2013
DIY Fall Bottles
Need an easy DIY Fall Home Decor idea? Have someone willing to save their beer bottles for you? Well, this one is for you. Thanks to my (seems like) endless supply of hemp/twine/jute...whatever you want to call it... and my man's love for Red Stripe Beer (you know, the ones that look like medicine bottles?) I've been able to do a couple projects like this! This is for my sister's house.


Lets get started!
Wednesday, August 28, 2013
Wall of Frames!
Because, who doesn't like a good ol' wall o' frames? :)
I've had my house for ONE YEAR now (I can't believe it! Time flies!) and I haven't even made one single DIY cheapo home decor post! I've been neglecting my blog, I know, but I've been having too much fun doing othercool stuff...meh...Ok, I have no good excuse. Time to put the big girl undies (I absolutely loathe that "P" word for women's underwear and refuse to type it, let alone say it) on and get back on the wagon.
BACK TO THE POINT...so I have a good sized wall in my dining room, a perfect palate for fun wall art! I thought I'd share what I've done with the space, as I have gotten lots of compliments on it! Little do they all know that majority of the objects on the wall are from, shhhhhhhh, thrift stores and garage sales! CHEAP! I'm cheap. I don't care. I mean come on, I'm24 25 and own a house, car, and have a bajillion bills to pay each month...I'm all for cheap.
I always wanted a wall where I could just put up a bunch of empty frames, thanks to all of the pinterest ideas. So I did just that. I was on a mission to find some cool lookin, empty picture frames. Our tiny little town of 3500 or so has three thrift stores. I hit the frickin jackpot. They each had tons of frames, lots of different sizes, shapes, and designs. Decisions decisions. I went for the more vintage looking detailed ones. I had found a couple vintage oval cameos at a garage sale, the week I closed on my house, that I couldn't pass up for the wall as well (yes I had already planned to do a wall of frames on that particular wall before I even bought the house). I think I spent maybe a total of 15 bucks? It wasn't much!
My kitchen and dining room are painted in vintage colors; coral, yellow, and aqua. I've decorated with old metal signs and records, a lot of which my family had saved from way back when (more pics to come). The dining room wall is a vintage yellow, so I planned to paint all of my objects with the other colors of the kitchen. I already had some teal, beige, and aqua spray paint, along with leftover coral wall paint.
After the painting was finished, I made a layout on the floor below the wall of how I wanted to place my frames/cameos. I still had a couple records to use, so I decided to add those in for fun accent pieces. I absolutely loved how it turned out! So fun! Here comes my attempt at good photography (hence all the angles and close ups I took).

I've had my house for ONE YEAR now (I can't believe it! Time flies!) and I haven't even made one single DIY cheapo home decor post! I've been neglecting my blog, I know, but I've been having too much fun doing other
BACK TO THE POINT...so I have a good sized wall in my dining room, a perfect palate for fun wall art! I thought I'd share what I've done with the space, as I have gotten lots of compliments on it! Little do they all know that majority of the objects on the wall are from, shhhhhhhh, thrift stores and garage sales! CHEAP! I'm cheap. I don't care. I mean come on, I'm
I always wanted a wall where I could just put up a bunch of empty frames, thanks to all of the pinterest ideas. So I did just that. I was on a mission to find some cool lookin, empty picture frames. Our tiny little town of 3500 or so has three thrift stores. I hit the frickin jackpot. They each had tons of frames, lots of different sizes, shapes, and designs. Decisions decisions. I went for the more vintage looking detailed ones. I had found a couple vintage oval cameos at a garage sale, the week I closed on my house, that I couldn't pass up for the wall as well (yes I had already planned to do a wall of frames on that particular wall before I even bought the house). I think I spent maybe a total of 15 bucks? It wasn't much!
My kitchen and dining room are painted in vintage colors; coral, yellow, and aqua. I've decorated with old metal signs and records, a lot of which my family had saved from way back when (more pics to come). The dining room wall is a vintage yellow, so I planned to paint all of my objects with the other colors of the kitchen. I already had some teal, beige, and aqua spray paint, along with leftover coral wall paint.
After the painting was finished, I made a layout on the floor below the wall of how I wanted to place my frames/cameos. I still had a couple records to use, so I decided to add those in for fun accent pieces. I absolutely loved how it turned out! So fun! Here comes my attempt at good photography (hence all the angles and close ups I took).
Be sure to click on the pics to have a bigger better view!

My darling sister gave me a nice black cabinet that fit perfect in that area and is great storage for crystal and party glasses! Thanks sis!
Tuesday, February 28, 2012
Spray Painted Clothes Pins
Yay for making laundry more fun!!!!! {HA}
Saw this idea HERE via Pinterest. I absolutely LOVED the vintage color scheme that she had! I decided to not copy {for once} and came up with my own melon-y color scheme.


I just spray painted each side of the clothes pins and let dry! They really do brighten up the laundry room a bit. I'm hoping it does the same to the actual "doing" of the laundry. :)

Thursday, December 8, 2011
Burnt Out Christmas Lights into Cute Sparkly Centerpiece!

This is simply brilliant. It turned out way better than originally planned. This honestly took me less than an hour to finish! DO IT!!!! You won't be sorry! Recycling is ALWAYS good!
Drab to Fab Centerpiece
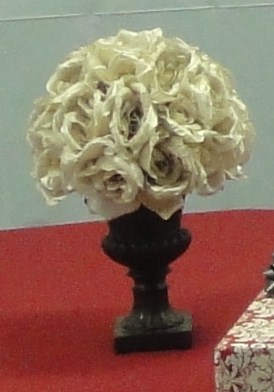
Sorry for the terrible picture quality. I forgot to take a before picture, so I had to find one with it in it and crop it way down. You'll get the point though, it definitely needed some color!
Subscribe to:
Posts (Atom)